Are you a new Outreach user or an admin trying to connect Outreach with HubSpot? Don’t worry – you’re not alone!
Setting up the Outreach HubSpot Integration might look confusing, especially if you’re doing it for the first time.
But once you understand the steps, this connection can make your work easier and help you keep track of customer information smoothly.
In this blog i’ll guide you through:
- The Outreach HubSpot Integration basics to help you get started smoothly.
- You’ll learn how to connect Outreach and HubSpot, sync key data, and fix common issues.
- The best practices to keep everything running smoothly.
Here are quick steps to integrate HubSpot with Outreach:
- Log in to Outreach
- Check Integration Requirements
- Install and Connect Outreach to HubSpot
- Configure Field Mappings
- Enable Two-Way Sync
- Test the Integration
- Start the Full Sync
Stick with me, and by the end, you’ll have a seamless HubSpot-Outreach integration that keeps all your contacts and activities in sync.
Outreach HubSpot Integration Overview
The Outreach HubSpot Integration is a powerful way to keep your sales and marketing data aligned without the hassle of manual updates.
Here’s a quick overview of what makes this integration valuable:
- Automated Data Sync: Any updates made in Outreach or HubSpot instantly sync across both platforms, saving you from repetitive data entry.
- Two-Way Syncing: Real-time syncing means changes in one platform automatically appear in the other, ensuring data accuracy and consistency.
- Improved Team Collaboration: With the latest prospect information always accessible, your sales and marketing teams stay on the same page, reducing the risk of errors or outdated information.
- Reduced Manual Work: No more copying data between platforms. The integration takes care of it, letting you focus more on building relationships and closing deals.
In short, the Outreach HubSpot Integration is designed to simplify your workflow, improve data accuracy, and help you manage leads more effectively.
🔥 2X Your Outreach Pipeline Now!
How Do I Set Up Outreach HubSpot Integration?
Integrating Outreach with HubSpot can streamline your workflow, eliminate manual data entry, and ensure your data stays up-to-date on both platforms.
Let's go through each step to get you set up and syncing quickly.
Step 1: Check Prerequisites
Before diving in, make sure you have the necessary permissions and subscriptions.
You’ll need admin access in both Outreach and HubSpot to initiate the integration, and if you're planning on using custom field mappings, make sure your HubSpot plan includes Operations Hub (Starter or above).
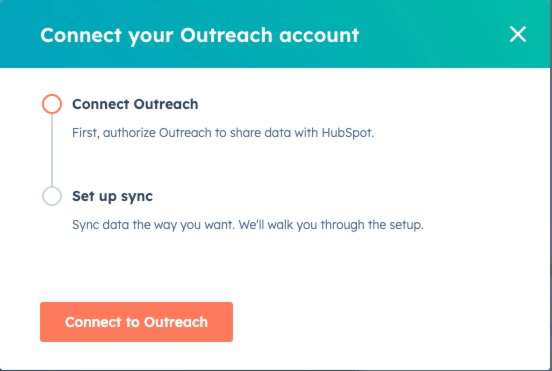
Step 2: Connect Outreach to HubSpot
Once you’ve confirmed access, head over to the HubSpot App Marketplace:
- In your HubSpot account, click the Marketplace icon in the main navigation bar and select App Marketplace.
- In the search bar, type Outreach and select it from the results.

- Click Install app in the top right corner, then follow the prompts to log in to your Outreach account.

- Review the access permissions, and if everything looks good, click Allow to finalize the connection.
After you complete this step, Outreach and HubSpot are connected, and you’re ready to start configuring sync settings!
Step 3: Configure Sync Settings
Now that the apps are connected, it’s time to set up your sync:
- Return to the Connected Apps section in HubSpot by clicking the Marketplace icon and selecting Manage > Connected apps.

- Select Outreach, then click Set up your sync.
- Choose the data objects you want to sync, such as Contacts, Companies, Deals, and Tasks.
Step 4: Set Up Two-Way or One-Way Sync
You have three options for data sync:
- Two-Way Sync (Recommended): This keeps data updated in both Outreach and HubSpot in real-time, so changes made in one platform are automatically reflected in the other.

- One-Way Sync from HubSpot to Outreach: Syncs data only from HubSpot to Outreach.

- One-Way Sync from Outreach to HubSpot: Syncs data only from Outreach to HubSpot.

Choose the sync direction that best fits your needs. Two-way sync is ideal for keeping everything aligned without manual updates.
Step 5: Customize Field Mappings
HubSpot provides default field mappings that match common data points between the two platforms. If you want more control:
- Go to the Map your Fields section in your sync settings.

- Review the default mappings and click Add a mapping if you need to match specific fields that aren't included by default.

- Choose the fields you want to map from Outreach to HubSpot or vice versa.
For example, you might map a custom “Lead Source” field in Outreach to a corresponding field in HubSpot.
Custom mappings are available if you have a paid Operations Hub subscription.
Step 6: Test the Integration
Before rolling out the sync on all your data, it’s a good idea to test it:
- Create a static list of a few contacts in HubSpot or Outreach.
- Run the sync to verify that the data transfers accurately.
- Check for any data conflicts or mismatches, and adjust your settings as needed.
Step 7: Start the Full Sync
Once everything is set up and tested, you’re ready for the full sync. Click Save and sync to activate the integration.
The initial sync might take a bit of time depending on your data volume, but after that, changes will sync every 5-10 minutes.
Tips for a Smooth Integration
- Use Sync Filters: Apply filters to control which data gets synced, reducing unnecessary data flow and focusing on relevant information.

- Review Field Mappings Regularly: As your team’s needs evolve, revisit and update your field mappings to keep data relevant and organized.
- Monitor Sync Logs: Regularly checking sync logs helps you spot issues early and keep data flowing smoothly.
By following these steps, you’ll have a smooth Outreach-HubSpot integration that keeps your teams connected and your data consistent across both platforms.
What Data Can Be Synced Between Outreach and HubSpot?
Syncing Outreach with HubSpot keeps your information up-to-date, helping your team focus on outreach and closing deals. Here’s a quick overview:
With this sync setup, your data stays accurate and everyone remains aligned, letting you focus more on goals and less on managing data!
🔥 2X Your Outreach Pipeline Now!
Best Practices for Outreach HubSpot Integration Success
To keep your Outreach HubSpot integration running smoothly, here are some essential tips:
1. Maintain Data Hygiene
- Regularly clean up duplicates and outdated entries to ensure smooth syncing.
- Use consistent formatting for fields like email addresses and phone numbers, reducing sync errors.
2. Monitor Sync Logs
- Check sync logs periodically for errors or failed sync attempts. Quick fixes keep your data flowing without disruptions.
3. Review Field Mappings
- Ensure your field mappings are up-to-date and relevant. Start with default mappings, and for custom needs, consider upgrading to HubSpot’s Operations Hub.
4. Enable Automatic Sync Settings
- Turn on two-way sync for real-time updates in both platforms, and use sync filters to limit what data is shared if needed.
5. Keep Tools Updated
- Enable automatic updates for the Outreach extension and stay informed of HubSpot updates to access the latest integration features and fixes.
Following these steps will help you keep your integration efficient, accurate, and hassle-free.
Common Issues in Outreach HubSpot Integration and How to Troubleshoot Them
Integrating Outreach with HubSpot can streamline data sync, but some common issues may pop up.
Let’s look into some of the common issues and quick fixes to keep your sync smooth.
Data Not Syncing Properly
If data isn’t syncing, the problem often lies in permissions or connection settings.
- Check Permissions: Ensure you’re a Super Admin or have the correct access in both platforms.
- Verify Connection: Go to HubSpot’s integration settings to confirm the connection is active. Reconnect if needed.
- Review Sync Settings: Confirm two-way or one-way sync is set up correctly.
Quick Fix: Resetting permissions and reconnecting often resolves sync delays or incomplete updates.
Missing Fields or Data
Sometimes, specific fields may not sync correctly due to mapping issues.
- Review Field Mappings: Check that all necessary fields, especially custom ones, are mapped between HubSpot and Outreach.
- Use Custom Mappings: If your HubSpot plan supports it, set custom mappings to match all required data fields.
- Save and Test: Apply and test mappings with a few records to confirm syncing.
Important Tip: Customized mappings prevent data gaps and ensure all fields sync properly.
Duplicate Data Entries
Duplicates can clutter your records and make data management a hassle.
- Use Sync Filters: Set filters to limit synced records, reducing duplicates.
- Run Duplicate Checks: Regularly check for duplicates in HubSpot and Outreach.

- Match Emails: Ensure each contact has a unique email address across platforms to avoid duplication.
Solution: Sync filters and routine duplicate checks keep your data clean and organized.
🔥 2X Your Outreach Pipeline Now!
Since, these are not the only issues with Outreach, email deliverability is the biggest one.
SendSure ensures that your bulk emails land directly in inboxes, not spam folders.

Why SendSure Matters for Outreach Users

Delivering bulk emails through Outreach.io can sometimes mean facing spam folder issues.
SendSure solves this by managing your email sending process to improve deliverability and ensure that your emails reach real, active inboxes.
How SendSure Enhances Your Outreach Email Strategy:
- Domain Rotation for Safe Sending: SendSure uses multiple domains for sending emails, reducing the risk of spam filters flagging your primary domain and improving your email reach.
- Email Verification to Reduce Bounces: SendSure verifies each email on your list, ensuring you only contact valid, active addresses. This lowers bounce rates, boosts your sender score, and helps your emails connect with real prospects.
For Outreach users focused on increasing deliverability, SendSure offers an easy solution to get better results, ensuring your outreach efforts have the highest impact.
Conclusion
Integration isn’t enough if emails miss the mark. Sendsure’s make sure your messages actually land in inboxes, giving your outreach real impact.
Schedule a free consultation today! And learn how you can 2X your pipeline.

